Just like the previous bedroom that was transformed, it's time for another transformation. This time it is happening to what was Little Big Man's room. He's long since moved to the attic bedroom. This has become a guest bedroom and it needs a bit of a refresh. In addition, the east window casing needed some love. Someday the radiator will get a little love, too.
I scraped, sanded, primed, and repainted the necessary parts of the window casing. Fortunately I still had some of the leftover matching paint.
The color scheme changed somewhat. The woodwork is still Ivory Tusk, but the walls are somewhat different. Below the chair rail remains "Eucalyptus Leaf" and above is now "Soft Fern".
Because of the color change, the old roman shades were removed and replaced with wood blinds that match the millwork. The valances have also been removed and will be re-upholstered with a coordinating fabric once we can get out into the world and find some.
New bedside tables were acquired, along with a new rug and an upright dresser.
bobeche, bobeche, bo-obeche Banana-fana fo-fobeche Fee-fi-mo-mobeche bobeche! Unfortunately during the biweekly cleaning routine a few weeks ago, one of our bobeches broke. It was a gift we'd received years ago and have no idea where it was from. As a result, we had trouble finding a matching replacement even though we did a lot of searching.
We decided to change gears and take advantage of the situation. So we moved the various bobeches around onto different candlesticks. The last piece of the puzzle was to buy a pair of bobeches to replace the broken one. These would coordinate better with a different set of candlesticks that were now bobeche-free.
The order was placed and they arrived yesterday.
This morning I installed the crystals onto the bobeche and put the resulting ensemble onto the candlesticks.
Voila.
P.S. - Bobeche is a French word. For pronunciation hints compare and contrast "cache" (a collection of items stored in a hidden place) vs "cachet" (the state of being admired or respected)...
As we've done various other projects, the root cellar has acted as a storage area for random things.
Years ago we removed the old shelving which had seen better days. They were too narrow and over the years had become too weak to really support anything. Removing them provided a little extra space in which we could store random stuff temporarily.
Eventually as other projects completed, everything else moved to its proper home and the the root cellar was empty.
Between Thanksgiving and Christmas, I worked on repairing the missing plaster in part of the ceiling. I chose to repair it rather than ripping it all down even though it is a small room and most of the basement doesn't have plaster on the ceiling any more.
When he was home on winter break Little Man did the final sanding and re-painted the room.
And while SWMBO was away on a girls weekend in January, he and I went to the store to get the shelving.
When she came back from her trip all the shelving was assembled and in place. I was surprised by the level of excitement she displayed over a bunch of basement shelving.
As part of the work, the radiator needed to be removed. Which meant that the system need to be drained first.
When ever the system gets drained, the air needs to be bled out of it before it will work properly.
Ours is a hot water system and the water won't circulate properly if there is any air in it.
Air is lighter than water (duh!) so the high spots are where the air collects. In each of these high spots you need an air bleed valve so you can let the air out of the system.
Therefore, each radiator has a bleed valve.
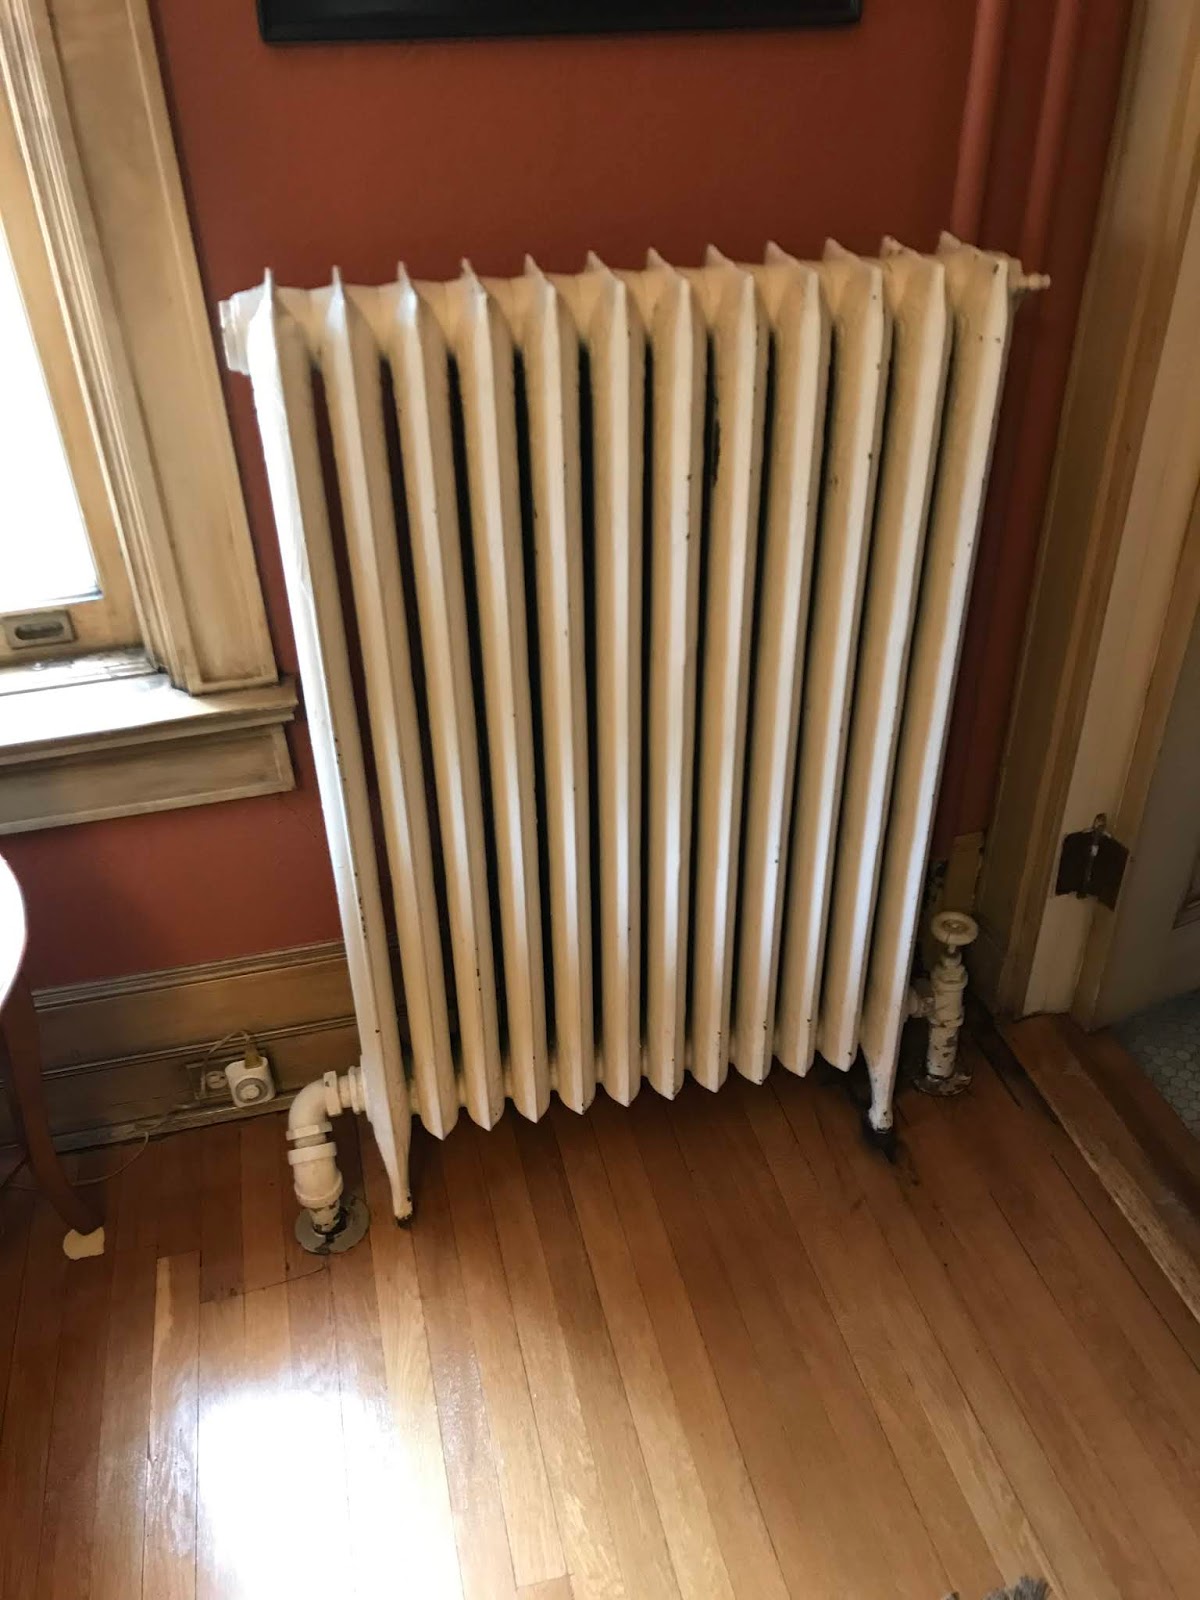
Here is one of our 18 radiators. Hot water comes into the radiator in the pipe at the lower right. It flows through the radiator and leaves to go back to the heat source through the pipe at the lower left. Each of the "fins" is hollow and made from cast iron. When operating properly it is filled with hot water that radiates heat into the room. When there is air in the radiator, water doesn't flow through it and it doesn't heat the room. The bleed valve protrudes from the top right of the radiator.
The bleed process is quite simple (example videos at the end of the post). You need a couple of items: a valve key to open/close the valve and a cup to catch the water.
Position the cup to catch any water
Open the valve with the key
Wait for the air to escape and water to come out the valve
Close the valve with the key
You need to do this process with each radiator and manifold, along with any other bleed valves you might have. Start with the ones that are highest and farthest from the heat source, working your way back down and toward the boiler.
You'll also need to manage the water and water pressure in the system while you're doing this. If the system has a lot of air, you'll eventually lose pressure to push the air out while bleeding. Make sure you don't add too much water, though. As the water heats up, the pressure rises (remember your high school physics...) and you don't want to trip your pressure relief valve or you'll be starting all over again
If you later hear water gurgling in a radiator, you need to bleed again. The gurgling indicates there is air in the system. You might also need to do this a couple of times over the course of a week or so to get all the air out.
Now for the videos. This one didn't have much air. It has a good view of the exit port.
This one had a bit more air, but still not too bad. It can sometimes take quite a while... A poorer view of the port, but you can better hear the transition from air to water.
Yesterday the dog started barking about something. He is good about letting us know when something new is happening. Once he is confident we are aware of what's going on, he stops.
This time it was because the roofer was here and starting to get things done.
The area over the front door is a flat roof with a rubber membrane. Or I should say *had* a rubber membrane.
Four layers of roofing were removed. Some of the framing is bad due to previous water damage and needs to be replaced. Other joists just need sistering.
Then new decking, gutters, and roofing material.
Then the columns and other millwork can get repaired/replaced. And finally painted.
Over time we'd noticed issues around the front facade which is why we had the front tuck-pointed last year. This year the plan was to get the mill-work repaired and repainted. Along the way we determined the flat roof needed to be redone as well.
There was some initial discussion about getting it done for Little Man's graduation party in June, but that didn't really work out. It was going to be too hard to get it squeezed into the short time frame.
I've lost track of time of when exactly this was, but I arrived home from work one night a while back and our contractor was on the boulevard explaining to the sub the various bits of carpentry that need to be fabricated. Fluted columns, moldings, and turned bits. Things were starting to line up.
I made a mental note that I should start on the cellar doors and wondered if I would have them done (or not!) before the front work was done. At the time, I thought it would be close. So I got started on the cellar doors.
And finished them.
Then a couple of weeks ago the scaffolding showed up for the front.
And the painting started. The prep, the priming, and the painting of the front proceeded pretty well.
As they were finishing up, we mentioned some other spots around the house that needed love. It's been ten years since the sides and back were painted, so needing a little touching up is normal. They jumped right on it and had all of it done pretty quickly.
Were still waiting on the roofer and the various carpentry, though.
The painters will have to come back to finish up after that.
In several previous posts I mentioned that the cellar doors needed to be rebuilt.
It's pretty obvious that though they served us well over the past 10 years or so, it's time for them to be replaced.
We looked at commercially available doors, but no one makes them this big. We also talked with our contractor who suggested fabricating wooden doors and then wrapping them with sheet metal so they'd last "forever". That option was more expensive than I thought prudent, so we went for the DIY option.
They are in shade a good portion of the day, so don't always dry out quickly.
We were also a little slow getting them painted, which I'm sure didn't help.
I've spent the past couple of weeks building the new ones a little at a time each night and using the old ones as a pattern.
The underlying framing structure was fine, so it didn't need to be replaced. Only the exposed facing needed help. Mostly it is 1x6 tongue & groove with the smooth side exposed. There's a 1x2 that caps the right edge and a 1x8 that wraps the right side.
This time I put at least one coat of solid stain on all six faces of each piece before assembly. I also followed up with a second coat over everything. That should help with their longevity.
In addition, I built them from cedar, which is a better wood for exposed conditions.
We also picked a different color this time. Rather than a color that contrasts with the brick, we picked one that coordinates with it. The stain was a recommendation from our friends at Abbott Paint. I have some left over, so will be able to re-coat when necessary.
A few weeks ago my parents called. They asked if I would come over to help install a new cartridge in their kitchen sink faucet. Theirs had been leaking and they had ordered the replacement part. We made plans for me to come over once the part arrived.
Coincidentally, our kitchen faucet had also started leaking. I went through the diagnosis and we had the same problem. The cartridge is a lifetime warranty item, so we had the manufacturer send a new one.
So, a few days apart, I got to play plumber and replace both.
My parents' is working fine, but ours is still dripping a little, so I'll need to play with it a bit more.