This week the in-floor heat system got installed.
Bill and his guys patched the bad spots in the sub-floor before installing the heat system panels and blanks. First the panels were dry-fit before gluing them down and screwing them into place.
Then Thursday night Bill and I installed the tubing. The grooves in the panels are a snug fit, so we had to use a rubber mallet to get the tubing into the grooves. There are two loops: one on the far side of the room and left if the island,and the other nearest the camera and right of the island.
The blanks are where the cabinets will be eventually.
And a picture of my fancy manifold for Daisy.
It has balance valves for the two loops, though they are close enough to the same length that we probably won't need them. It also has flow meters for each loop, shut-off valves, and thermometers for the supply & return, and an air bleed valve at the upper right. I hooked it all up Friday and will pressure test it later.
This will be hidden behind some cabinets eventually.
Friday, August 5, 2016
Saturday, July 30, 2016
Kitchen - Week 8
The final coat of mud went on last weekend.
Early in the week everything got sanded.
Late in the week the painter was here to prime and put on a coat of ceiling white.
There's also a stack of hardwood floor boards in the hallway acclimatizing to their new home.
Next week the plan is to level the floor and start installing the in-floor hydronic heating system.
The in-floor heat will get connected to the same system panel as the master bathroom, but the method and components for installing the tubing in the kitchen floor are different.
Early in the week everything got sanded.
Late in the week the painter was here to prime and put on a coat of ceiling white.
There's also a stack of hardwood floor boards in the hallway acclimatizing to their new home.
Next week the plan is to level the floor and start installing the in-floor hydronic heating system.
The in-floor heat will get connected to the same system panel as the master bathroom, but the method and components for installing the tubing in the kitchen floor are different.
Friday, July 22, 2016
Kitchen - Week 7
Most of the drywall was hung early in the week on the walls.
The missing parts for the in-floor hydronic manifold finally arrived and I was able to install the manifold and hook up the supply and return lines. Just in time for the last of the drywall to get hung.
Then mudding and taping started.
A couple of coats are on already. Might need another, but we'll have to see after it dries.
The missing parts for the in-floor hydronic manifold finally arrived and I was able to install the manifold and hook up the supply and return lines. Just in time for the last of the drywall to get hung.
Then mudding and taping started.
A couple of coats are on already. Might need another, but we'll have to see after it dries.
Saturday, July 16, 2016
The New Neighbors
We've had some new neighbors move in this summer. It's taken a while for me to get a good picture of them. I finally got one this morning with a long lens.
They weren't entirely happy with me mowing the lawn underneath them. They kept calling to another member of the family in a tree in the neighbor's yard.
I've also noticed that more of our perennials are unmolested this year and there may be a correlation...
They weren't entirely happy with me mowing the lawn underneath them. They kept calling to another member of the family in a tree in the neighbor's yard.
I've also noticed that more of our perennials are unmolested this year and there may be a correlation...
Friday, July 15, 2016
Kitchen - Week 6
The exterior walls were insulated this week. This room has always been the most impacted by the weather - cold in the winter and hot in the summer. Now that there's insulation, it should be much better.
The second entry into the kitchen was also created this week. With modern entertaining styles this will help traffic flow a lot, without destroying the integrity of the design.
Here's the view from the inside where you can see the new header and jack studs.
And drywall was installed on the ceiling!
The second entry into the kitchen was also created this week. With modern entertaining styles this will help traffic flow a lot, without destroying the integrity of the design.
Here's the view from the inside where you can see the new header and jack studs.
And drywall was installed on the ceiling!
Saturday, July 9, 2016
Kitchen - Week 5
Apologies for skipping a week.
Since the last update, more mechanical work has been done; mostly electrical.
There are ultimately going to be six switches here to control various lights. They will be 3-way switches so that everything can be controlled from either entrance.
Six switches probably sounds like a lot, but there are in-cabinet lights, under-cabinet lights (note the whip above and slightly to the left of the switch boxes), pendants over the island, recessed cans over the island, recessed cans at the edges of the room, and recessed cans on the way to the dining room.
There was never enough light in the old kitchen and we're making sure that doesn't happen again.
They'll all be dimmable so I don't have to wear sunglasses.
Since the last update, more mechanical work has been done; mostly electrical.
There are ultimately going to be six switches here to control various lights. They will be 3-way switches so that everything can be controlled from either entrance.
Six switches probably sounds like a lot, but there are in-cabinet lights, under-cabinet lights (note the whip above and slightly to the left of the switch boxes), pendants over the island, recessed cans over the island, recessed cans at the edges of the room, and recessed cans on the way to the dining room.
There was never enough light in the old kitchen and we're making sure that doesn't happen again.
They'll all be dimmable so I don't have to wear sunglasses.
Sunday, July 3, 2016
More Blood, Sweat, and Tears
Last week I was drilling holes for the kitchen's in-floor heat tubing.
The old bottom plates in the stud bays are quite hard and the bit binds on occasion. The bit also has an auger point that pulls the bit through the wood, assuming the drill has enough power and there's wood to engage the auger.
Once the auger breaks through, it's of no help. So you have to apply more pressure to the drill to complete the hole.
Here's what happens when it finally breaks through and you forgot about the nail sticking out of the back of the wood lath...
The observant will be able to tell which one sacrificed itself for the others...
Saturday, June 25, 2016
The Gentle Curve
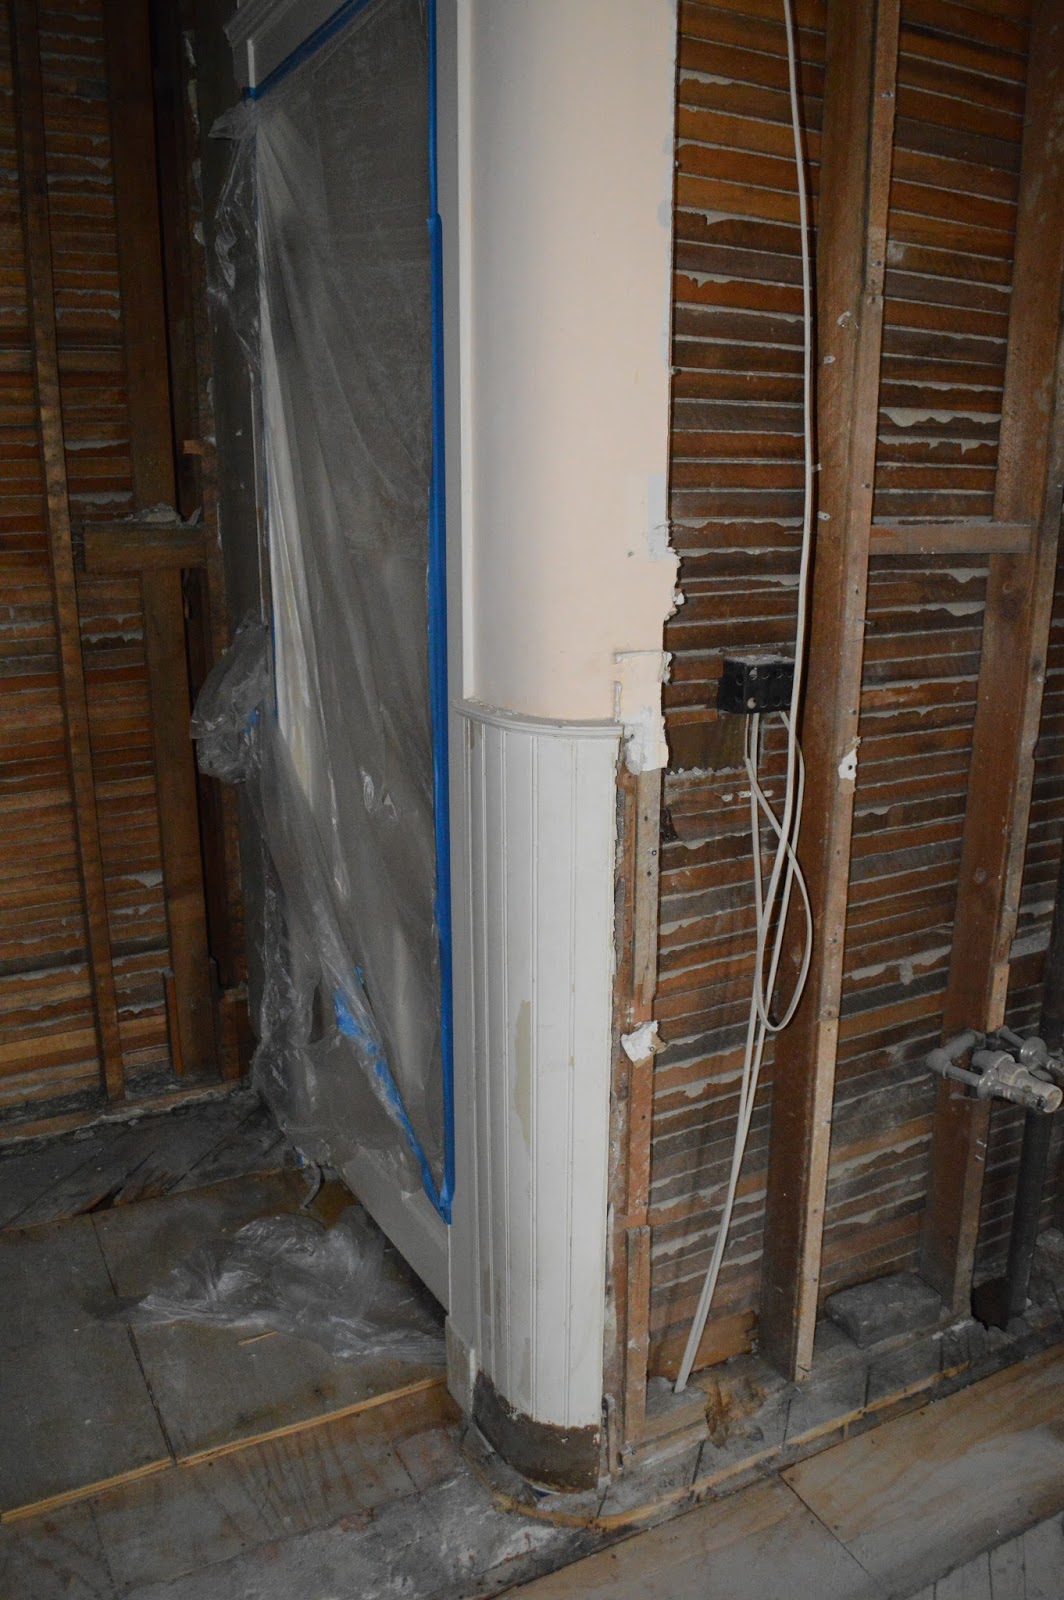
This is the gentle curve that inspired the handful of similar corners in the attic. We're going to try to preserve this if we can.
The wainscoting also served as the inspiration for the little bits of wainscoting in the attic and the kid's bath.
As a spatial reference, the plastic sheeting left of the corner is sealing the doorway from the kitchen into the dining room.
The wainscoting also served as the inspiration for the little bits of wainscoting in the attic and the kid's bath.
As a spatial reference, the plastic sheeting left of the corner is sealing the doorway from the kitchen into the dining room.
Wednesday, June 22, 2016
The Water Main
The plumber has been here this week removing the old plumbing in the kitchen and starting on the new. That includes some work in the basement to straighten things out. Most of the drain and vent work was done last week. This week it's been the water supply.
Some of the supply lines had been replaced over the years, but the main hadn't been replaced in a long time. It was still galvanized pipe with a gate valve. In the picture you can see the gate valve from the house side of the meter post-removal.
It was in pretty sad shape.
You can also see some of the other chunks of galvanized pipe that were replaced while he was in there.
We'll get a little better flow now...
Some of the supply lines had been replaced over the years, but the main hadn't been replaced in a long time. It was still galvanized pipe with a gate valve. In the picture you can see the gate valve from the house side of the meter post-removal.
It was in pretty sad shape.
You can also see some of the other chunks of galvanized pipe that were replaced while he was in there.
We'll get a little better flow now...
Friday, June 17, 2016
Kitchen - Week 3
This week the framing was largely completed on the walls and ceiling. Now they are all level and plumb.
Exterior walls were framed out in a way that allows any other mechanicals (plumbing and wiring) to go between the studs and the brick. The technique of running the studs perpendicular to their normal orientation preserves as much of the space as possible while still allowing for insulation.
The ceiling was also made level (to a consistent height throughout the room!) with nailing surfaces 24" on center.
The plumber was also here to put in the drain and vent lines. Both can be seen sticking up in the center of the room where the island will be located eventually. Along the wall between the two windows you can see where the plumbing vent is run between the framing and brick
Exterior walls were framed out in a way that allows any other mechanicals (plumbing and wiring) to go between the studs and the brick. The technique of running the studs perpendicular to their normal orientation preserves as much of the space as possible while still allowing for insulation.
The ceiling was also made level (to a consistent height throughout the room!) with nailing surfaces 24" on center.
The plumber was also here to put in the drain and vent lines. Both can be seen sticking up in the center of the room where the island will be located eventually. Along the wall between the two windows you can see where the plumbing vent is run between the framing and brick
Subscribe to:
Posts (Atom)