Saturday, December 4, 2010

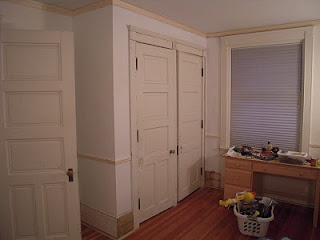
Dressing Table


The slow collecting of furniture continues.

We found this last weekend. After doing some research, it appears to be pre-1930, based on the manufacturer's inscriptions. Though it's not particularly valuable, we like it regardless.

As is usual, there was some assembly required. The way the mirror attached to the base was, ummm... all wrong. A couple of blocks of wood, some drywall screws, and a screwdriver wedged in there to keep the mirror from flopping over...

I'm sure the correct hardware was lost long ago. So I went off to the hardware store to get the right stuff.

It's much better now.

Wednesday, December 1, 2010

Another Mail Slot


This is likely the last outdoor project for the year.

I took advantage of the nice weather this past Sunday and installed this mail slot for the carriage house. There was no mail slot in this door previously.

A new coat of paint in the spring and this door will look great!

Saturday, November 27, 2010

Thumb-turn Latches


If you'd found one of these in a bag and the other laying on the floor 30 feet away (and two years ago) in your basement, would you have known that they belong together?

Me either.

I'm glad that two years ago I saved the the two thumb-turns. I'd always wondered what they were for.

I'd found the cover plate in a bag with a bunch of random stuff earlier in the week.

Fortunately there was a door that still had the cover plate, but it was missing its thumb-turn.

I have no idea how I remembered that I had these thumb-turns with 1/4-inch square spindles. It was just one of those "I wonder if that thing in the basement will fit this" moments...

Wednesday, November 24, 2010

Crystal Door Knob Parts


There are pieces of hardware missing (and hiding) everywhere.

When I ordered the mail slot, I also ordered a handful of new door knob spindles (top). Some old ones were in bad shape (bottom) - the threads were mangled, the corners were rounded-off, etc. As a result you never knew if the latch would open or the knob would fall off in your hand.

I suspect this pair of knobs were purposely missing their rosettes. The threads on the end of this spindle were so bad you couldn't thread the knobs on unless the rosettes on both sides were removed.

I finally got around to installing the new spindles today. And now that I know how well they work, I need to inventory every door and decide how many more we need.

Several of the doors are missing set-screws for the spindle, rosettes for the knobs (center of the picture), thumb-turn latches, and keyhole covers. While I was cleaning the basement recently, I found some of the missing hardware - a handful of rosettes and keyhole covers. Not all of the missing ones, unfortunately.

And, of course, the screws are nowhere to be found. That's OK though, many of the installed rosettes and keyhole covers are missing screws.

I'll just do my part to jump start the economy by buying a box of 100 at Seven Corners - I'll probably need at least that many...

And I still have some antiquing solution left.

Tuesday, November 23, 2010

Reupholstery


Projects always take longer than you think...

A while ago I'd repaired the dining room chairs. However there were two chairs that had large red wine stains on them. Reupholstering them was today's project.

In the picture is a finished chair (left) and a stained chair (right).

Of course, doing the first one took several hours of trial and error to get the fabric to lay properly. And the second one took only 30 minutes or so.

Like in life, you don't know everything you need to know until after you're done doing it...

Monday, November 22, 2010

New Mail Slot - Part 2


Another week where I'm staying home from work to... work!

I've finally been able to reattach the box that's on the inside of the door to catch the mail after it comes through the mail slot.  It is a clever old design, especially the sides that fan out like playing cards when you open it.

It had been attached by nailing through the front of the door.  Not the easiest for removal and re-installation.  But it's not like you'll ever need to remove and re-install it.  I mean, a wooden door won't ever need to be re-finished will it?

Tuesday, November 9, 2010

New Mail Slot


The stuff we ordered from House of Antique Hardware arrived over the weekend.  One of the things was a new mail slot.

The old one (top) didn't quite fit the period of the house.  The new one (bottom) looks much better.

Once again, what should have been a 30 minute task... took 4 days.

To be fair, daylight savings time played a role in that - I had other commitments during daylight and it's hard to do this kind of work in the dark.

The slot came with all the proper hardware, except that it's meant for a door that is 1/2 inch thicker.  So I needed to make a trip to get shorter screws.

And though both slots "swing out", the new one's pivot point is behind the trim.  So I needed to remove some extra material from the door.  And re-install the slot. And remove it. And remove some more material from the door.  And re-install the slot. And remove it...

And, obviously, the door needs to be re-screened and re-finished.  I'm saving that for next spring.

Tuesday, October 19, 2010

Antiquing Brass


Lots of websites will claim you can antique brass with vinegar.

It didn't work for me no matter how long I soaked the piece.

I picked up some Brass Darkening Solution at Rockler the other day. It works like a charm. And fast. Only a few minutes soaking in the solution produced the results pictured. On the right are the new screws and washers; middle are the results after soaking for a few minutes; on the left are the 115 year-old originals. I soaked the washers in a small bowl filled with the solution. The screw threads are still bright because I held the screws by the threads and dipped in only the heads for a minute or so. I've hardly made a dent in my 2-ounce bottle and done 10 of the ~75 screw/washer sets. So it goes a long way and it beats having to wait 50 years...

Rockler also had what's almost a perfect match for the missing latch for the storm window.

Rockler is my other "new" favorite store. I bought some stuff there a million years (and two houses) ago. The salesman was impressed because I had a 4-digit customer number and they are up to 8-digits now... If you are a woodworker stop in; they have some stuff you cannot find anywhere else.

Saturday, October 9, 2010

The Pedimented Window - Part 2


After removing the nails holding the screen frames in place (and the other nails distributed randomly about, with heads protruding, and serving no apparent purpose), it was obvious that the screens weren't removed the last time this window was painted. There were big blobs of paint in the gaps between the screen and the frame; all over the hinges; etc. And much of it needs to be scraped off or the storms won't close properly.

(Maybe that's why the screens wouldn't stay closed and needed to be nailed shut - hint, hint... Or maybe it's the missing latch hardware - it's probably in the same place as the missing window stop screws!)

And, of course, the holes for the hinge screws on both the screen frames and the storms are completely stripped out.

Back to the workshop for the materials needed to ream the holes and fill with dowels and glue. I've had lots of practice at this, so it goes easy until...

One of the screw holes in the storm has a framing nail in it. It doesn't appear to be serving a purpose, either. Someone just pounded it into the existing screw hole, but the hole is so loose I can pull it out with my fingers.

So, um..

Why?!

At any rate, if I find the last missing piece of latch hardware, this project is done. For now...

The Pedimented Window...


"The pedimented window above the portico is particularly fine." At least, that's what it says in Larry Millet's AIA Guide to St. Paul's Summit Avenue and Hill District.

Who am I to argue? Excepting the work I have to get it back to expectations...

The screens are shown in this picture.

OK, what is supposed to be screens. The frames are there, but only the bottom openings actually have screen in them. Even the bottom screens have holes large enough for an Acteon Beetle to get through...

A while ago I'd found the storm windows in the basement. I've replaced the broken glass, scraped & painted them, and am ready to swap them in for the winter.

I can't get them open. Good thing the screening is missing so I can get outside. And what do I find?

The screen frames have been nailed into place...

Back to the workshop to put on my tool belt. This isn't a 10 minute project.

Sunday, October 3, 2010

The Black Hole


You know the black hole that consumes socks from the laundry so that you eventually end up with at least one sock that's missing its mate?

Well we've got a black hole that consumes the screws that hold window stops in place. Note the screw near the bottom of the side stop and the holes for the two missing screws on the bottom stop.

Not surprisingly, between the various windows in the house, there are 74 missing screws by my count - and a handful more missing their washers.

There are also a few screws that have been replaced with the wrong type. It's not like the correct ones are made out of Unobtanium by Bavarian Elves, they're just brass screws with round, slotted heads.

So I might as well buy a box of 100 each next time I'm at Seven Corners.

And I'll have to find a way to antique/age them so they don't look so out of place next to the old ones.

Saturday, September 25, 2010

Piddly Project Day


Too many little things have started to either annoy me or prevent me from checking things off my "honey-do" list.

I'm tired of sliding off this toilet (note that the missing pieces on the bottom of the seat that are supposed to keep it level). Every time I sit down I feel like I'm in one of those episodes of "Mad About You" with the sloping floor. So there's now a fancy, new, unstained seat installed. There's still an unpleasant odor on occasion, so I think think the wax ring is shot. A minor mechanical update of this room may be in the cards soon.

I finished painting the study walls, too. Yeah, I know, supposedly this was done a while ago. Well, some friends stopped over just as I was close to finishing up and I didn't get to the exposed radiator pipes on one wall along with the 6-inch by 10-foot strip behind the pipes where the roller wouldn't fit. Done now.

I also installed the other half of the base shoe in the study. It had been removed when we had the floors refinished and I finally found it.

Also caulked and foamed the threshold in the carriage house. All the rain over the past few days exposed some shortcomings at the bottom of the door frame/jamb.

And re-glazed a storm window for the kids' bathroom. Still needs paint before it can be installed. Of course we're out of that color, so paint and installation will have to wait for another day.

Break time is over! Back to Work!

Thursday, September 23, 2010

More Shades


I installed this shade last night. Its mates on the other back hall windows have been installed for quite a while, but this one had to wait. The window frame is an odd shape at the top so I had to make and upholster a piece that fit the top 6-inches of the opening. It also had to provide a place to mount the shade. It's 1/4"x 6 on the face and 1x2 for the cleats around the edges. The fabric on the face is the same as the shade. The back is painted to match the eventual woodwork color.

Of course, the woodwork needs some help...

Saturday, September 18, 2010

More Tile Installation


This afternoon I finished grouting the tile in the carriage house entryway. It's the same tile and grout as in the carriage house's kitchen and bath.

You can see the new threshold and door sweep as well. I had to shave a half inch off the bottom of the door, but at least there is a true threshold there now. Before the floor inside and sidewalk outside were at the same level, so there wasn't anything keeping snow/rain from getting inside...

Carriage House Update


Got the carriage house windows painted over the past few weeks (inside; the outside of the windows will have to wait until next year). This morning we installed a bunch of valances and I got prep work done on several projects.

More on those later...

Saturday, September 4, 2010

What Else Can I Say?


She received this as a gift from some neighbors, Mary and Mark, and is taking advantage of it this weekend.

Now there is trouble!

Thursday, September 2, 2010

More Tile Removal


I finished removing the tile in the entry of the carriage house tonight. At one point She Who Must Be Obeyed came out to check on me and claimed I was "bleeding profusely". I wouldn't call it "profusely", but that's the difference in our personalities. With little shards of the $#%! tile flying everywhere, I'm not surprised I received a few cuts here and there. Safety glasses are a good thing, but they don't protect your forehead...

Some of the tiles came up easily; mostly the ones that were along the left side of the picture. The ones that were in the foreground and along the right side tended to break into a few large pieces - not so bad. But, the ones close to the stairs tended to break into little #$%! pieces. And of course, the concrete under those (close to the stairs) isn't in the greatest shape either...

But that's why I did the demolition before the long weekend - to allow extra time for fixing the stuff you can't see before you start.

I'll also be installing a new threshold. The old one has been removed, but I'm not sure you can tell in the picture. The old wooden one was mostly non-existent!

Thursday, July 22, 2010

Front Entry


I painted the walls in the front entry last weekend. The previous color was very similar to the color of the woodwork and washed out the whole space.

The sage color works well with the rug and really accentuates the woodwork and makes the whole space "pop". Unfortunately it also accentuates that the woodwork is in serious need of new paint as well. But one thing at a time...

Friday, July 16, 2010

Free Mulch!


The county has free mulch at a number of compost sites. Bring your own tools and containers and you can have as much as you want until they run out.

This week I've been making trips periodically with my Dad's pickup. 3 loads down and probably another 8 or so to go. At least I'm getting my exercise and staying out of trouble...

This week's slide show is the island bed between the driveway and the patio. At the beginning of the year it contained a lonely weeping Birch. Later we added Quick Fire Hydrangeas, upright Sedum, Coreopsis, and some annuals. The light-colored mulch is the free stuff from the county; the darker is cocoa mulch for the annual bed. The cocoa mulch smells fantastic when you first put it on!

Saturday, July 10, 2010

The Library


The library is finally done.

There really wasn't a lot to do in this room once we refinished the floor, but other things took precedence. ;-)

The woodwork has an interesting aged finish that we wanted to keep. The previous wall color wasn't bad, but it was a bit too orange at certain times of the day. So, last weekend I painted the walls. We picked a color that is in the painting on the bathroom door and coordinates with the furniture we already had. The new color looks a lot better with the mill-work and brings out the colors in the tile around the fireplace. While I was at it, the ceiling needed a little patching and a fresh coat of paint too.

Those with a sharp eye will notice that we have window treatments as well. They came and were installed this afternoon.

Wednesday, June 23, 2010

Square or Level?

This is an old house.

It's had 115 years to settle and go out of square and level.

Before we had the carpet installed in the master and sitting room, I noticed that the sitting room door wasn't level with the floor when it was open. The latch end of the door appeared to be closer to the floor than the hinge end.

When the carpet was installed, it was confirmed. The latch end of the door dragged pretty badly on the carpet. So badly that you could get the door only a third of the way open. As a result, the carpet installers removed the door and set it aside for me to fix later.

I assumed it was the floor that was uneven. While the floor is uneven, the bottom edge of the door wasn't square with the hinge edge. At the latch end, the bottom was half an inch longer.

Seriously.

Using the edges of the raised panels on the front of the door as a guide, it was obvious to the naked eye.

Because this door has a large mirror on the back, it weighs a ton. It's too heavy to easily carry down the stairs and outside to square-off the bottom edge of the door. So I had to do it in the room. A tarp and tenting the work area with some plastic sheeting kept the sawdust to a minimum.

So tonight I was the boy in the bubble for a few minutes.

Tuesday, June 15, 2010

Rebuild the Hose Bib


Well, the list of no-longer-broken things continues to grow.

Some day it might even be longer than the list of still-broken things.

The hose bib on the carriage house leaked just behind the handle. OK, I shouldn't really say "leaked" - more water came out the "freezeless" drain holes than into the hose!

After some research I found that this is actually a decent outdoor faucet and the manufacturer, Woodford, makes a repair kit. The kit contains all new internals, except the operating rod, and a new handle. The operating rod is threaded at each end and can be re-used. The plunger (top) threads onto one end and the drain valve (2nd from top) threads onto the other. The old parts are on the right of the rod; new ones on the left. It's nice to see that the right new parts, including the handle, are brass/metal. They should last longer than the old plastic ones.

Removal was relatively easy - I was nervous about applying too much force to the old plastic head nut, but it came out without breaking. Dis-assembly was a snap an re-installation was smooth. I just wish I had longer, thinner fingers to get the head nut gasket (left side, 4th from top) in place more easily.

Works great now and we're no longer watering the carriage house foundation needlessly.

Monday, June 14, 2010

New Closet - Part X

Finally.

I didn't get time to finish the mudding inside the closet earlier. I finally finished it last week and painted the ceiling. While painting the walls, I ran out of paint. The interior of the closet is the same color as the top half of the walls in the rest of the room and I came up short by less than half a quart...

It's always something.

Over the weekend and between other jobs, I installed the shelving.

The closet is finally done. OK, except that I have to find the missing latch and door knob.

Tuesday, June 1, 2010

Newcomers 92 - Transplants 26


I spent Memorial Day remembering what it was like to sit around and do nothing. In reality the score was much closer than it looked. Because the transplants had to be dug up first, I'm doubling their score to 52.

The transplants put up a good fight. The 26 of them had to be moved to their proper locations - we'd just stuck them next to the carriage house when we moved in. They're divisions of perennials that we brought from our old house. Some of them are divisions that can be traced back to plants that my grandfather had...

The newcomers were dropped off by Boyd late yesterday morning. I planted 78 of them yesterday; the rest tonight. There were a variety of sizes, including 1, 2, 3, and 5-gallon containers and a great mixture of small trees, shrubs, and perennials.

I need to put my feet up now...

Saturday, May 29, 2010

Grandpa Al's Tools

Hey, it's an old house without central air. Most of the time that's not a problem - the high ceilings help and the solid brick exterior and plaster walls provide a enough mass that it takes a while to get hot inside. Problem is once it gets hot it stays hot.

We had a window unit in the master bedroom last summer, but the new storm windows we put in last fall have an opening that's a little narrower than the inner sash. And, as it turns out, it's half an inch narrower than the housing of that window air conditioner...

After some searching, I finally found a new AC unit that would fit. Have you ever noticed that the "facets" feature of most websites doesn't let you narrow your search on the thing you're really interested in?

Of course, the bottom edge of the storm window frame is also higher than the sill, so I had to make a shim so that the AC unit would have the proper tilt. And that particular window sill isn't level, so the shim is half an inch thicker on one end. And the sill is bowed up in the middle... :-)

Thanks to Grandpa Al for all the tools that I used to get the shim perfect...

Sunday, May 16, 2010

This One's For You


For all the neighbors who have stopped by and said, "Wow! I didn't know grass would grow here."

Thanks. And this one is for you.

For all those who doubted grass seed would grow here.

Patience grasshopper.

And this one is for you, too. ;-)

Sunday, May 9, 2010

Completed Master Bedroom


The master bedroom is finally done! The carpet was installed on Wednesday, meaning all the "construction" is done. The master carpet has a subtle pattern, so we needed to move everything out for the installers. This and the sitting room are the only places where we're doing wall to wall carpet. In this room the fir floor was in decent shape, but at some point someone face nailed with common nails to try to stop the squeaks. Ugh!

Smooth-shanked nails won't stop squeaks.

Common framing nails (with large heads) are the wrong "tool" for finish carpentry work.

It feels good to finally have one room complete. Now I can take some time off (sort of) and "relax"...

Thursday, April 29, 2010

Master Fireplace


At long last we finally have the new marble surround on the master fireplace.

When we moved in, the subway tile on the floor in front of the fireplace was in sad shape. The surround on the face of the fireplace was just a sheet of 1/4-inch plywood.

Quite a while go, I'd removed the tile along the floor. More recently, I removed the plywood surround and discovered that some of the subway tile had been removed from the face. But only up to the top of the firebox. Removing the rest was a pain. Very few of the tiles came off in one piece...

Due to lack of time, I decided not to do the tiling; rather we'd hire someone to do it. However, the floor in front of the fireplace was uneven and the tile guy said to save a bit of money I should use some "self-leveling" mix to create a solid, smooth base.

Right.

The "self-leveling" mix didn't. And so he had to chip it out and pour more before installing the tile. So much for saving a few bucks...

But the new marble looks fabulous!

Sunday, April 25, 2010

Little Big Man


When we first moved in he was looking for something elaborate. But it's been so long, he's not into knights and castles any more.

After some talking about what the theme would be, he settled on no theme. He picked out the bedding and the colors - "Yosemite Sand" and "Eucalyptus Leaf".

And I painted this week.

There's still a bit of sanding & painting to do inside the closet before I install the shelving. And the roman shades I tried to install yesterday need to be remade - they were mis-measured and are 3 inched too narrow.

Sunday, April 18, 2010

She Who Must be Obeyed, Jr


Not everything can or will be painted with historic colors.

SWMBO, Jr was allowed to choose. She picked "Valentines Day" and "Lilly Lavender".

And I spent all day yesterday painting.

The chair rail (link contains before photo) is new and was installed last November.

The upper cabinet doors had been painted shut. Luke and his guys found lots of the previous owners' stuff in there when he prep'd for painting the woodwork.

Look Mom - No Wires!

No more wires from the utility pole over the carriage house roof, through the tree branches, and finally attached to the porch.

The cable guy was here last night to tie-off the cable directly to the side of the carriage house. From there it runs underground to the main house and into the distribution panel.

The tech did a fine job once he arrived and understood what he needed to do. Sadly, life imitates art - "the tech will be there sometime between 8am and 7pm."

It's a good thing I spent the entire day (8am - 9:30pm) painting, so I wasn't just waiting for him. More on that later...

Saturday, April 10, 2010

Painted Sitting Room


Wow!

This color is rich. I spent all day painting this room today. This is the room where "we" removed an old closet shortly after we moved in. This picture is of the same corner where the closet was. There also was an extra door into the bathroom.

Now we can finalize the rug color, get some window treatments, get the bookshelves/entertainment cabinets, and this room is done.... ;-)

Painted Master


I finished painting the master bedroom last weekend. The color is a neutral, historic color. It changes tone quite a bit depending on the time of day and type of light. At times it has a tan or taupe undertone; at others it has a green or olive note.

Throughout the week I've been re-installing the roman shades, drapes, furniture, etc. Compare to the pictures from a previous post. We recently found the chest of drawers at a local antique shop. It's a lot of fun to find things one at a time. Then everything has a story and some history.

The bench and chaise we had before and we had them re-upholstered. They look fantastic!

Sunday, April 4, 2010

Connections

Some might remember the TV series Connections with James Burke. The one where he connects seemingly random events - sort of like the Challenger disaster being related to the width of two horses' behinds in ancient Rome.

Likewise, I finished painting the master bedroom this weekend. Naturally, it involved doing some demolition in a pantry closet in the kitchen...

So I wanted to paint the master bedroom this weekend. I filled the minor holes and cracks in the plaster and did other prep work. Then I remembered(!) that the cable TV enters the house through and outside wall in the master bedroom. Yup, just like the old phone lines, the CATV is run from the pole to the outside of the house. The splitter is on the exterior and the various lines run along the outside until they reach the room where they're needed. Then they drilled through the brick and let the end of the cable dangle into the room.

The main one comes in near the ceiling in the master and has about 40 feet of extra cable. The loose cable runs along the master bedroom floor and into the room next to the master bedroom...

Needless to say I wanted to do this right by running the cable through the wall cavity and having proper CATV outlets so that I could patch the existing holes before I painted. I also wanted to get the CATV run from a real main distribution point, just like the new phone lines.

So up in the attic I go to find a way to chase the cable down to the basement. I found the plumbing stack that runs from the attic through the master bathroom and through the kitchen on the way to the basement. However, the stack is hidden behind some plywood in the back corner of a pantry cabinet in the kitchen. It's nothing a little sledge hammer won't cure. ;-)

As I'm demolishing, my father-in-law calls. He asks She Who Must Be Obeyed, "What's all that noise? I thought you were painting the master bedroom?"

She nonchalantly replies, "We are. And to do it we need to tear some stuff out of that pantry in the kitchen."

He mumbles acknowledgment, but knows better than to ask for clarification...

So I ran the cable down the chase and fished a cable down into the wall in the sitting room. I hooked everything up and...

Static.

I should have known that we'd get interference from the power feed to the electrical sub-panel in the attic. You can't run high and low voltage close together and parallel to each other.

After a little head scratching, I remembered that we chased PEX up from the basement for the laundry room. I re-cut some of those holes, chased the CATV up through those walls, hooked everything up, and...

STATIC!

More head scratching and a little figuring. Oh yeah, this run is on the long side. So off to the home center to get a signal amplifier.

Works like a charm.

And then I could fill the old holes and paint the master bedroom.

Saturday, March 27, 2010

Beige. I think I'll paint the ceiling beige...

That's how She Who Must Be Obeyed greeted me this morning. It's a punchline from an old joke, buts it's somewhat appropriate.

A long time ago, She Who Must Be Obeyed removed the fabric covering the ceiling in a couple of rooms. The fabric was falling down on its own, so it needed to come down. The plaster underneath was in surprisingly good condition in most places, but it was a little discolored in some spots and had never been painted. I filled the cracks and repaired in where necessary, but didn't paint it. That's this weekend's project now that the woodwork painting is done.

I've already primed the bare plaster today and will be doing some more prep in the other bedrooms this evening. Tomorrow it's ceiling white rather than beige...

Wednesday, March 24, 2010

Finished Millwork


Wow! Luke's painting of the woodwork is fantastic!

Here are a representative before picture (some windows were worse!) and after picture.

Now I'm on the hook for the next bits of work...

Monday, March 15, 2010

Painting the Millwork


Luke has been over all last week preparing for painting the millwork we installed. He's filled the gaps, cracks, and places where the surface was uneven. He's primed the bare wood, some old and all the new moldings we installed. A couple of the rooms already have a first finish coat applied. He's spraying the paint so that we have a nice smooth, hard finish. He has everything tented, bagged, taped, or covered so paint goes only where it's supposed to.

It's looking fantastic!

Friday, March 5, 2010

The Steam Box

Every once in a while you have to channel MacGuyver...

This is the steam box I fabricated. It's just a couple of pieces of PVC pipe. The inside diameter is a little bigger than the molding we needed to bend, but I should have gone a little bigger so the steam circulated easier. There's a cap at the far end to let the chamber fill with steam. The far end it also higher so as the steam cools, the water can run out and down the drain. The 2x4 is just there for support - the PVC starts getting soft as it gets warm. ;-)

Then we just needed a way to fill it with steam. I found some vinyl tubing that fit the outlet on the steam source and the other end was inserted into the PVC pipe.

Don't tell my mother-in-law, it's her clothing steamer...

Sunday, February 28, 2010

Nemesis

After much trial and error over the past few weeks (did you think we were just messing about in those other rooms? ;-), tonight my dad and I finally finished the base shoe in the master bedroom. The big problem was bending the molding along the curved wall.

We tried wrapping it in wet towels overnight. Didn't work.

We tried back-cutting notches along the back side of the molding. Sort of worked, but the top of the molding kept wanting to roll over.

We tried steaming it in a fabricated steam box. That also kind of worked.

Finally, we did a little of each and added a new wrinkle. Back-cut the stock, steamed it, and then put it in a form and let it dry for a couple of hours so that it would hold its shape while we worked it into position.

Of course, the room and curve aren't really symmetrical (and half of the curve is *slightly* larger than a 4x8 sheet of plywood), so we needed to custom make the form for each half of the curve...

"The Doors Don't Match..."


So says She Who Must Be Obeyed.

After some discussion about what *exactly* that meant, it turns out that it means the top panel of the mirrored door isn't the same height as the top panel of the other door. Since nothing is impossible for those who don't have to do it...

My Dad and his friend Frank came over one day this week to flip the door over. The other side of the mirrored door has the matching panel layout. Because we wanted the door to swing the same direction, they had to mortise for the hinges on the opposite edge of the door, mortise for the latch box, and fill the old mortises with a dutchman.

They did great work; it looks awesome.

Sunday, February 21, 2010

"A Portal to Another Dimension..."


After we'd started on the closet demolition, my son said, "Dad, that looks like a portal to another dimension." Little did we know...

Yesterday, we installed the chair rail without much trouble. But the "picture rail" has been a challenge. There really isn't any crown molding in the house, but there is picture rail in most of the rooms. Except this one. We'd looked a number of places to find picture rail to no avail. Well, there are a few places that carry some, but it's either not the right style or it's too small. It's way too expensive to have knives cut and a short run of custom matching picture rail made for the little bit we need. So we found some casing that has a similar profile and we've installed that.

OK, so enough background.

First we tried installing it flush with the ceiling. The ceiling is so wavy we couldn't get any joints to match up.

Then we tried using a laser level to shoot a line around the room. For some reason, when we started in one corner and shot our way around the room, we ended up a half inch off. Now I know that gravity will bend light, but NOT by half an inch around a 12x16 foot room! Maybe this is a portal to another dimension...

Finally, we cut a spacer to measure down from the ceiling at each corner and snapped a chalk line down each wall so we had the appropriate quarter inch gap between the ceiling and the top of the molding in the corners. Everywhere else the gap will just float some.

Now this room is ready for paint.

Saturday, February 20, 2010

Closet Doors


We finally got the other door on last weekend. And during the week I've been chipping away at installing the casing and other moldings. Now the exterior is completely done. A few small chunks of base molding are all that remain to be installed on the interior - I'll have those done before my Dad comes over today. Chair rail and crown/picture molding this weekend and this room is ready for paint as well.

Friday, February 12, 2010

More Base Shoe


I took the day off to make some more progress on the closet and moldings. Before my Dad came over, I got the filler pieces installed on the back side of the installed closet door's frame. I also started on the base shoe in the family room. By the time we quit for the day we'd finished the base shoe in the family room and installed a few pieces in the master. We'll have to figure out how to bend several pieces for the curved wall in the master tomorrow. I'm sure there will be some noodling time while we install the other closet door.

It's a good thing we don't charge by the hour...

Sunday, February 7, 2010

Closet Door


Yesterday my Dad was over and we re-hung one of the closet doors. Solid with that big piece of mirror on it means it's heavy. We still have a bit of adjusting to do with the hinges. They need longer screws to reach through the jamb into the jack stud. And some tweaking to prevent the door from rubbing on the latch side of the jamb as it opens and closes.

The other door didn't get installed because I cracked the jamb while trying to take it apart. It's from a wall that was a little thicker than standard so we needed to take it apart to rip 3/4-inch off the back side. Of course, they used half-a-dozen common nails to hold it together - so I needed to use too much force to get it apart. And I split part of it. Nothing a little carpenters glue won't fix.

The rest of the day we spent installing base shoe. And we got one room done. That room is ready for Luke to come spray the woodwork!

Sunday, January 24, 2010

What's This?


We've found some interesting things when doing various projects. No big piles of money, but we're up to about $1.68 in change. Most of that was found in semi-animate blobs of lint and other unidentifiable stuff in the laundry room...

I've also learned to be very careful when doing demolition near or below a bathroom. I can't count the number of razor blades I've found in the wall. Apparently the slot in the old medicine cabinets was often used as a place to dispose of old razor blades - they just fall into the wall cavity. It's a good reminder to wear sturdy gloves when you're digging around in the debris too.

This thing has me stumped. I have no idea what it is. It's about 1/8-inch thick, though it tapers to a point at the sharp end. At it's widest point it's 5/8-inch wide.

I'm offering a reward of a lint-covered pile of change to anyone who can tell me what it really is. :-)

Saturday, January 23, 2010

New Closet


We finished most of the closet framing last weekend when my Dad was over. It's tough to get stuff done during the week - life gets in the way. So I finished up the framing this morning. Once again, we're salvaging stuff we removed earlier - this time some doors. We roughed the openings perfectly; the door frames slipped in like a glove and will hardly need any shims.

This afternoon I went out "skating" on the glaze iced roads to get the remaining materials. I should have listened to the weather forecast last night...

And after nearly killing myself on the icy steps, I hung the rock and got the first coat of compound on.

Sunday, January 17, 2010

Glued and Screwed

When She Who Must Be Obeyed says, "We can do that...", you know who "we" is...

Our old dining room table was nice, but it wasn't the right style. It was also too small for the size of this dining room - it looked like you were transported back to kindergarten where everything is undersized.

We found a better/larger table & chairs at H and B, but the chairs needed some work. The back legs on most of them were loose. Because I only have one set of bar clamps, I've been fixing one chair a day for the last several weekends. The dining room has become a makeshift workshop while I take the take the seat off, gently separate the sides and front legs from the back, re-glue the joints, screw them back together, clamp them up, and let the glue dry overnight. The next morning the clamps are removed, the seat is re-installed, and I do it all again on the next one. After having fixed ten of them, I can get one done before everyone else is up for breakfast...

Saturday, January 16, 2010

Poly the Floor


Got up early this morning and finished sanding the floor. It sanded out nicely and I put the first coat of polyurethane on tonight. So far it looks really good and it will need a couple more coats.

In between, I did a whole bunch of other stuff. The base shoe is missing, incorrect, or in bad shape in a number of rooms and we're replacing it with new that we had milled at Scherer Brothers. My Dad came over this afternoon and he removed the old base shoe in a couple of rooms while I salvaged some baseboard and cap from a back bedroom. Later in the weekend we'll be using what I salvaged to patch where I removed some doors and a closet a while back. Then we can install the new base shoe everywhere.

I also tried valiantly to insulate the gap between the baseboard and floor boards on the curved wall in the master bedroom. The cold air has been rushing in because there has been no base shoe since we moved in. Unfortunately, the gap is big and there's little to adhere to so the foam keeps falling down the wall cavity. At least the dining room walls are getting insulated... :-)

Friday, January 15, 2010

Demo the Corner Closet - part 3


Finished the demolition tonight. Finally.

Once the old studs were removed, you could see that all the base moldings are still intact. This closet is definitely not original. Also notice the old striped wallpaper just above the base molding. There is also a paper border here and there with a floral motif.

I also started sanding the floor so that it matches where we had the floors refinished. Once again, I ran out of time and supplies - making a run to Menards for sandpaper just before they closed. At least I have everything to get an early start tomorrow.

My Dad is coming over in the afternoon so we can tackle a bunch of things this weekend...